AR Lab
Demo Notebooks
There are two Demo Notebooks available for general lab and demo purposes- Mr Pink
- Mr Blue
- Attach Mr Pink or Mr Blue to Ethernet (WLAN won't do)
- Boot ACRONIS Software (fetch CD from Patrick Maier, press F12 to enter boot menu)
- Choose category Backup
- Choose My Computer to make a raw backup of all harddisks (don't panic, they will be compressed)
- Select all harddisks for backup, press next
- Select a storage location for the backup
- Choose *Network neighborhood"
- Choose Camp as workgroup
- Choose campdata
- Enter your login credentials (don't check the NT-authentification checkbox and don't forget to prepend your login with
CAMP\) - Press the long button to check the connection. It should be successful.
- Go to directory
\\CAMPDATA\staff\FAR\DemoNotebooks\hdd_image\ - Choose a suitable filename
- Press OK
- Select new backup archive and press Next
- Select Complete and press Next twice
- Under compression rate, choose high, press Next
- Enter a comment, if you like, press Next
- Press complete
- Go and cook coffee for the others
ART-Tracking
Hardware
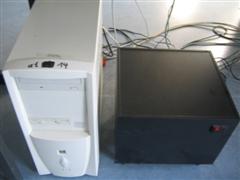
- 3 ( or 2 ) DTrack1 cameras, 1 tracking machine (atnavab35, see FAR Computer).
- for more information about ART Trtacking , see http://www.ar-tracking.de
Hardware setup of the tracking system on atnavab35
- Networkadapter with 4 connectors for the camera data
- Network adapter with 4 BNC Connectors for the camera sync signals
Marker Balls
- they are expensive, so take care of them
- if you need some, see MarkerKugeln
Software
- Settings/Network:
- UDP addresses for the three computer atnavab14-16
- 131.159.10.59 Port 5000
- 131.159.10.60 Port 5000
- 131.159.10.61 Port 5000
- Data Divisor 3
- Output only 6D
- Protocol ASCII
- UDP addresses for the three computer atnavab14-16
Calibration

ART Calibration
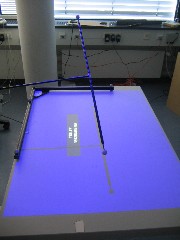
- make sure the Tablebeamer is started in full screen mode
- Calibrate te TableBeamer
- place angle bracket so that bottom left corner of image is on middle of corner marker
- hide all other markers, make sure cameras show "0"
- In D-Track: Calibrate -> Room -> Continue
- Wave around D-Track wand and make sure all cameras show "6" most of the time, this takes a couple seconds
- Check results, select ok
- Settings -> Tracking -> number of 6d bodies: 6
- Calibrate -> Body , due to body. Then wave the above bodies, one by one.
- In D-Track: Settings increase number of 6d bodies by one
- Settings -> Advanced : Set body active
- Settings -> Advanced -> body n Setting : Edit the name of the new body
- Hide all other bodies
- Place the new body on the table and make sure that all cameras can see all markerballs
- Calibrate -> Body, due to body
- Check results, select OK
Table Beamer (on atnavab16)


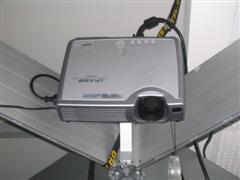
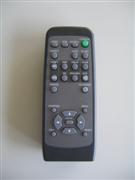
Table Beamer and its remote control
Software
The X server on atnavab16 is configured to use two seperate screens X-Display  | Screen |
|---|---|
| 0.1 | Table Beamer |
| 0.0 | Monitor |
-display=:x.y commandline option.
This does not work with the viewer, since no variables can be set in the ServiceDescription's startCommand. You will have to write a small shell script to change the display environment variable:
export DISPLAY=:0.1
Calibration
By convention adjust beamer image width to 1m on the projection table.Wireless LAN (AR-Lab)
Some nive text about theAR-Lab named W-Lan.
See Through Laptop (lapnavab49)
- This a HP tablet PC running Linux and Windows XP on dual boot. See FarComputers
Sound System (Dolby 5.1) (on atnavab14)

Sound System
Sony Glasstron PLM-S700E
Two computers are configured for the Sony Glastron HMD:- the tabletpc wnavab14
- atnavab15
Intersense
The Intersense Tracking System is not installed at the moment. This may be part of future work.OptiTrack?
- Homepage NaturalPoint?: http://www.naturalpoint.com
- Verwaltung der (leider sehr teuren) MarkerKugeln
